When I think back to my first selfmade bluetooth speaker which I named “TotallyNotABomb” because of … reasons, I can’t help but smile. This creation is pumping out music for over a decade now, which honestly amazes me considering I was 13 years old when I started throwing it together. Sure, it’s ridiculously loud and with its overpowered amplifier pushing a 15″ subwoofer that shovels air like a hair dryer, it gets the job done. While it sounds ok, it isn’t winning any audiophile awards either.
However, my creation of duct-tape and loose wires is far from practical. As time went on, the limitations became harder to ignore. Every time I want to use it, I find myself walking on eggshells, constantly worried I might accidentally damage something. This is the level of user-friendliness:
- Want to power it on? Flip the massive industrial-looking switch and prepare for the loud pop that announces its awakening.
- Need to adjust the volume? You have two options: The physical knob or your phone. Good luck managing both. Turn the phone too low and suddenly the system’s background noise becomes the main attraction.
- Time to charge? Remove the selfmade battery pack (yes, the one that looks suspiciously explosive) and put it into the external charger.
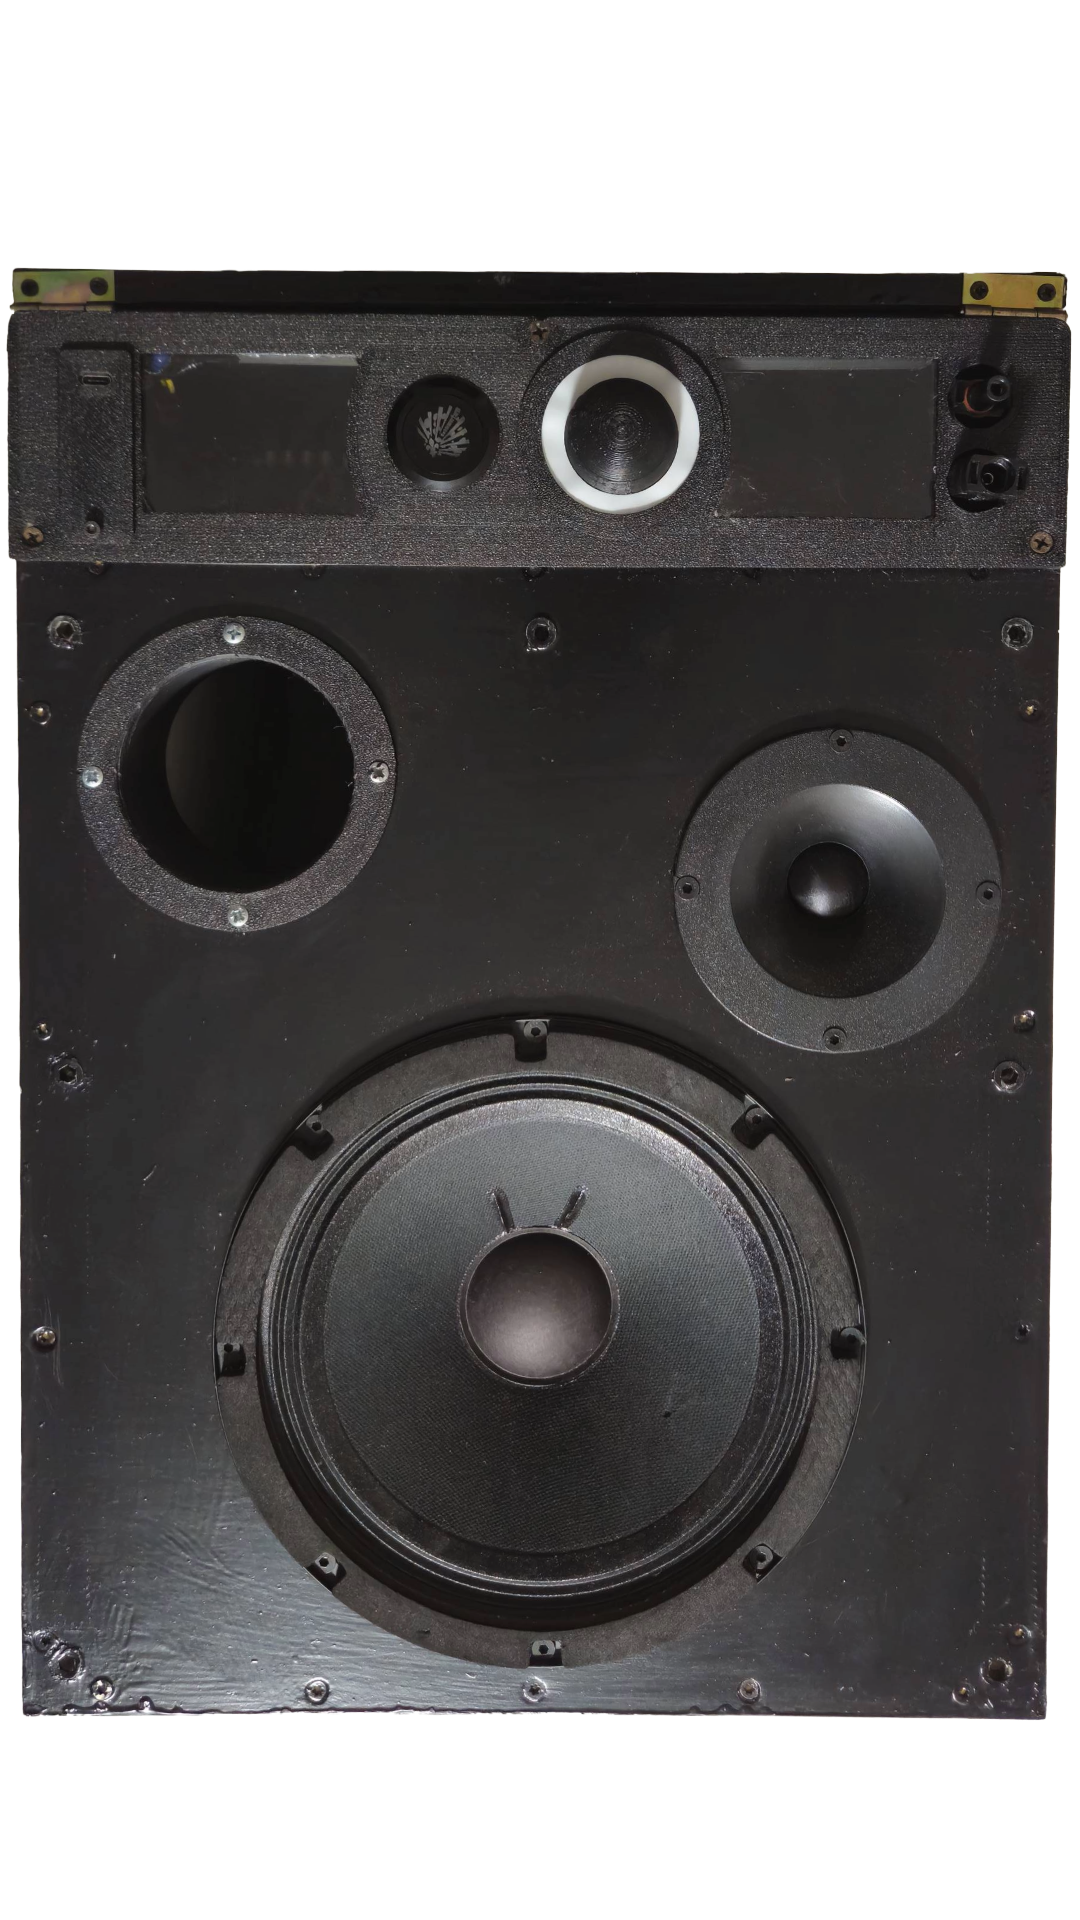
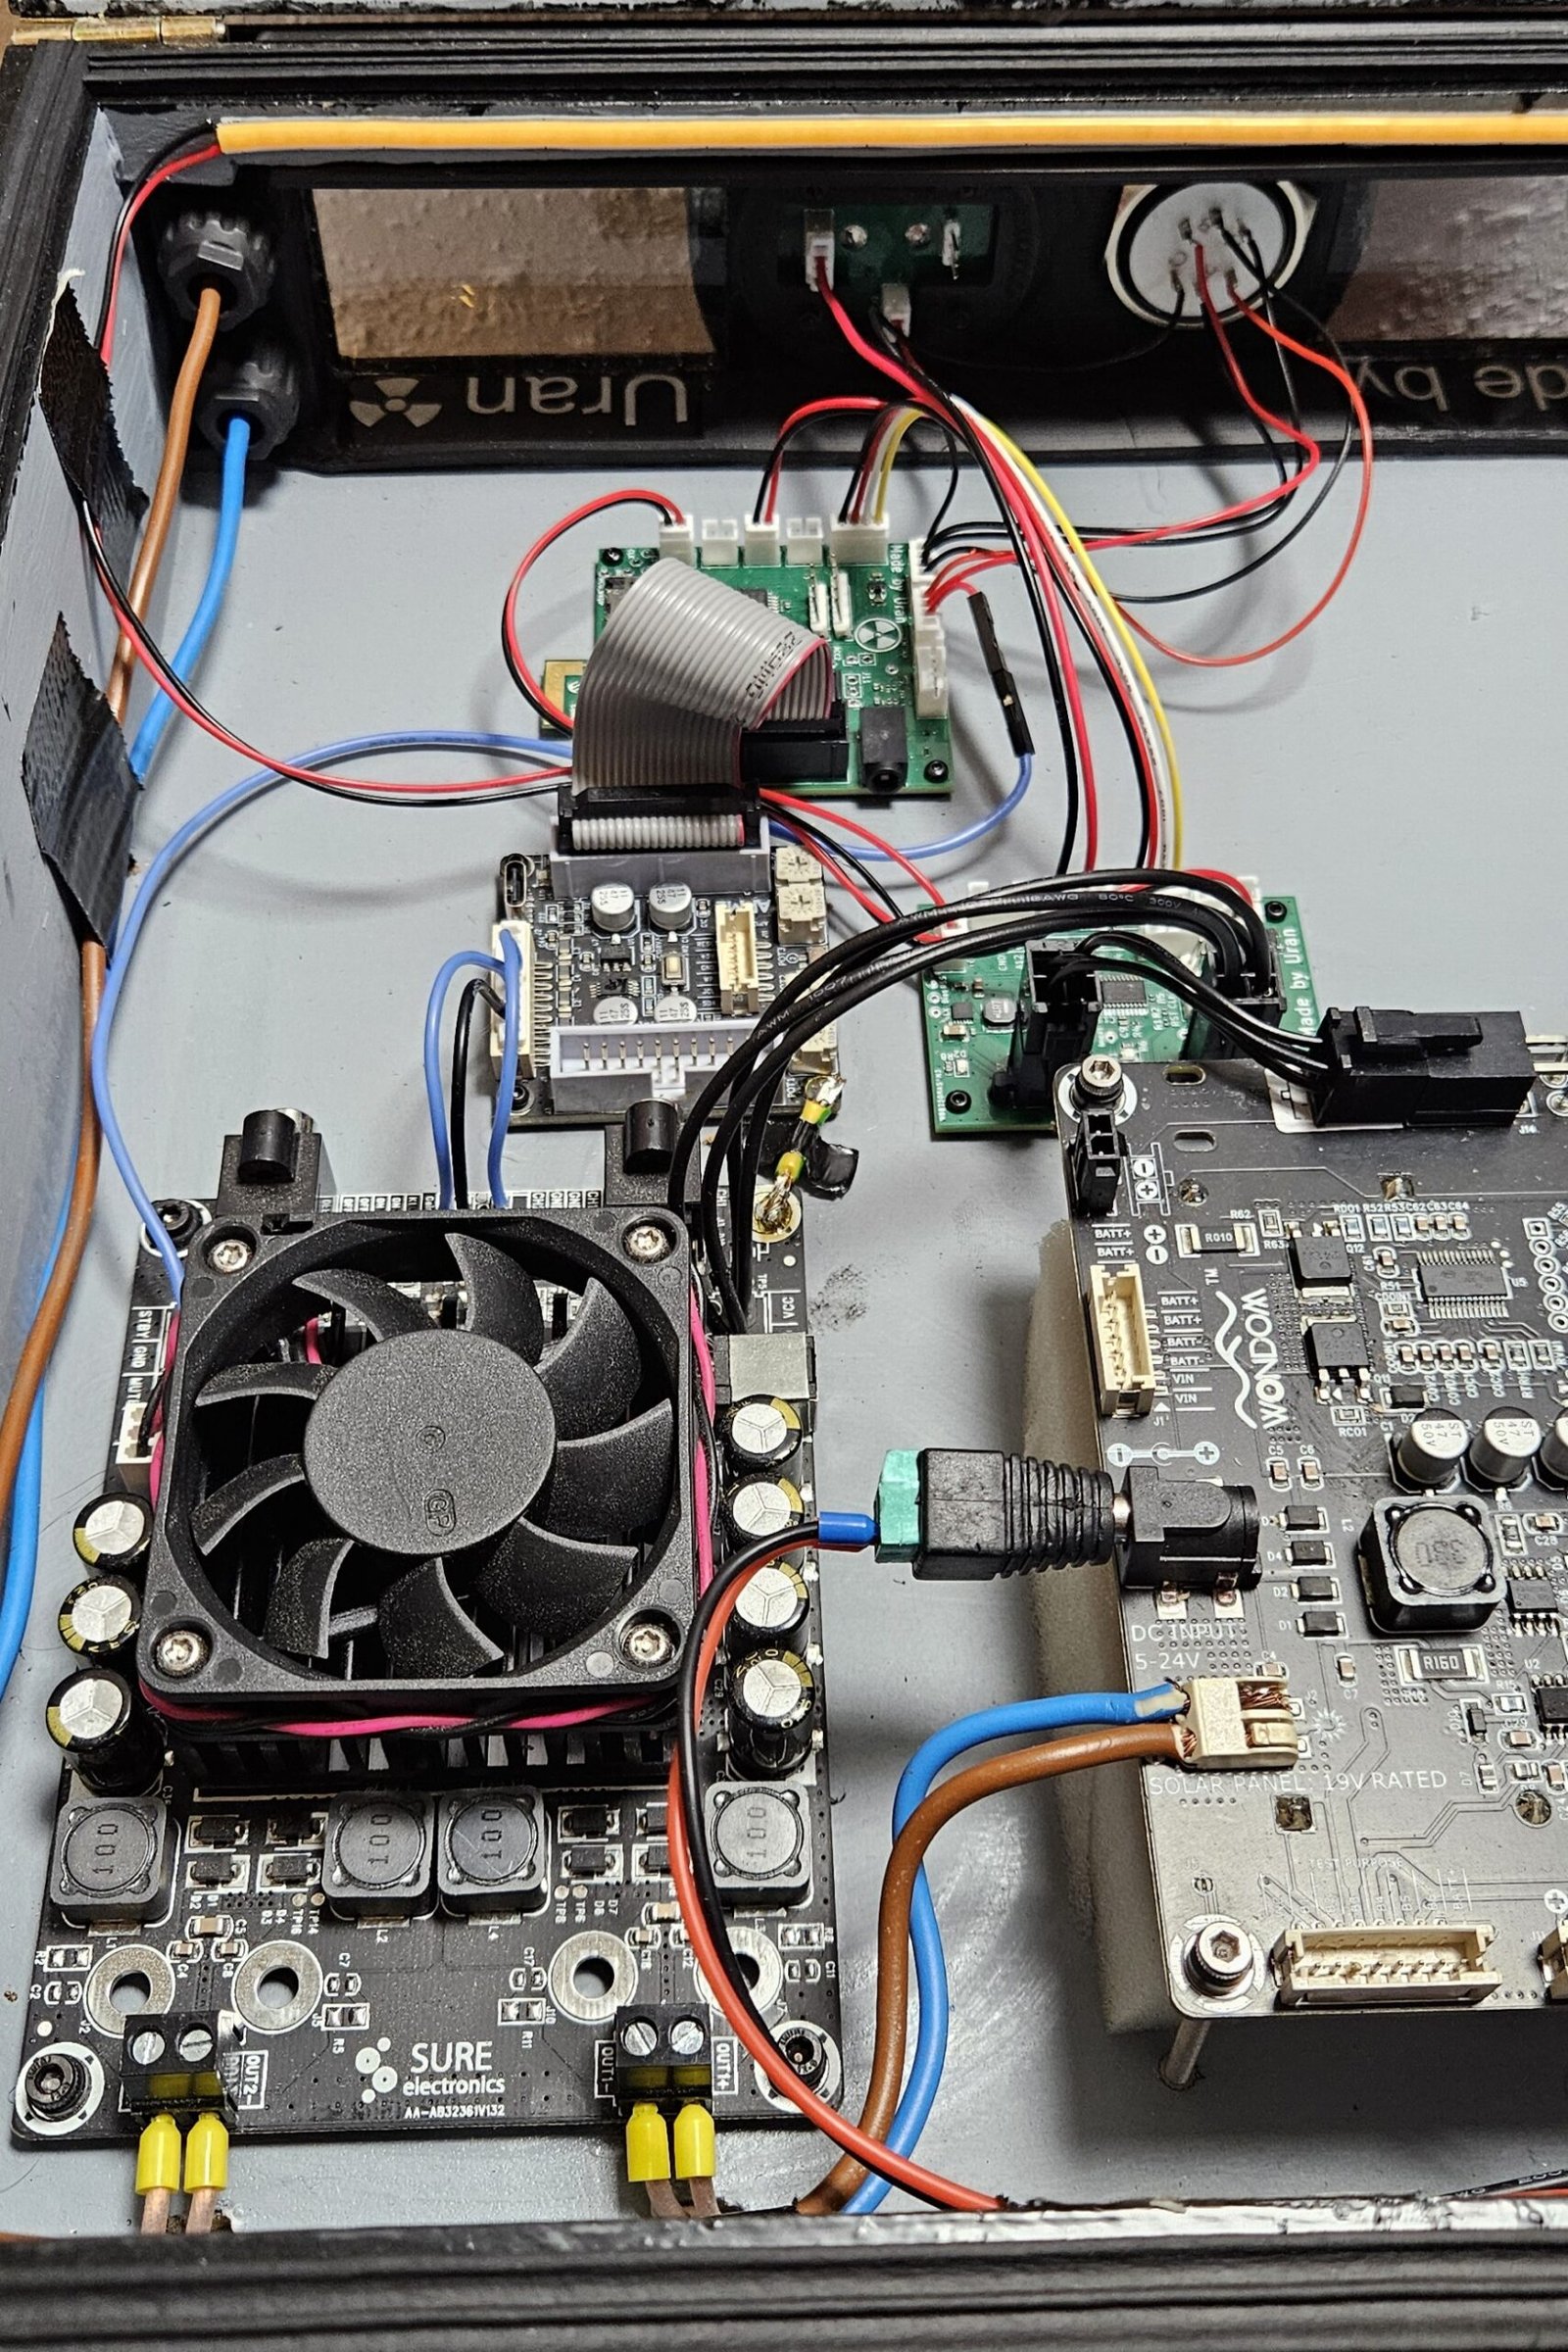
- Fix something? Have fun… (see the last picture)
Time for an Upgrade

As much as I appreciated my scrappy first attempt, I realized that I needed something fundamentally different for my next project. This time, I wasn’t just building for myself: I was creating a speaker system for my scouts organization.
The speakers need to survive dozens of different users, from 12-year-olds to adults. I needed speakers that were user-friendly enough for anyone to operate intuitively, with a “grandparent-proof” level of simplicity. It also had to be reliable. We’re talking about equipment that might get dragged through muddy campsites, survive sudden downpours and endure the kind of enthusiastic handling that comes with scouts activities. The old “please handle with care” approach wasn’t going to cut it. The speakers needed to work flawlessly for outdoor games and those crucial moments when you need music to keep spirits up like after a storm with torn tents.
I definitely wasn’t giving up the endless customization that makes DIY projects worthwhile. After all, we love weird features and unexpected surprises, where the speakers do something completely ridiculous that nobody asked for. And let’s be real: What even is the point of a speaker that doesn’t scream when treated too harshly?
Acoustics
I went with a 2-way speaker design with an 8-inch woofer handling the low end, and a tweeter taking care of the highs. Instead of using traditional analog crossovers with capacitors and inductors, I decided to go fully digital. I’m using a stereo amplifier where one channel drives the woofer and the other drives the tweeter, with a DSP handling the frequency splitting digitally.
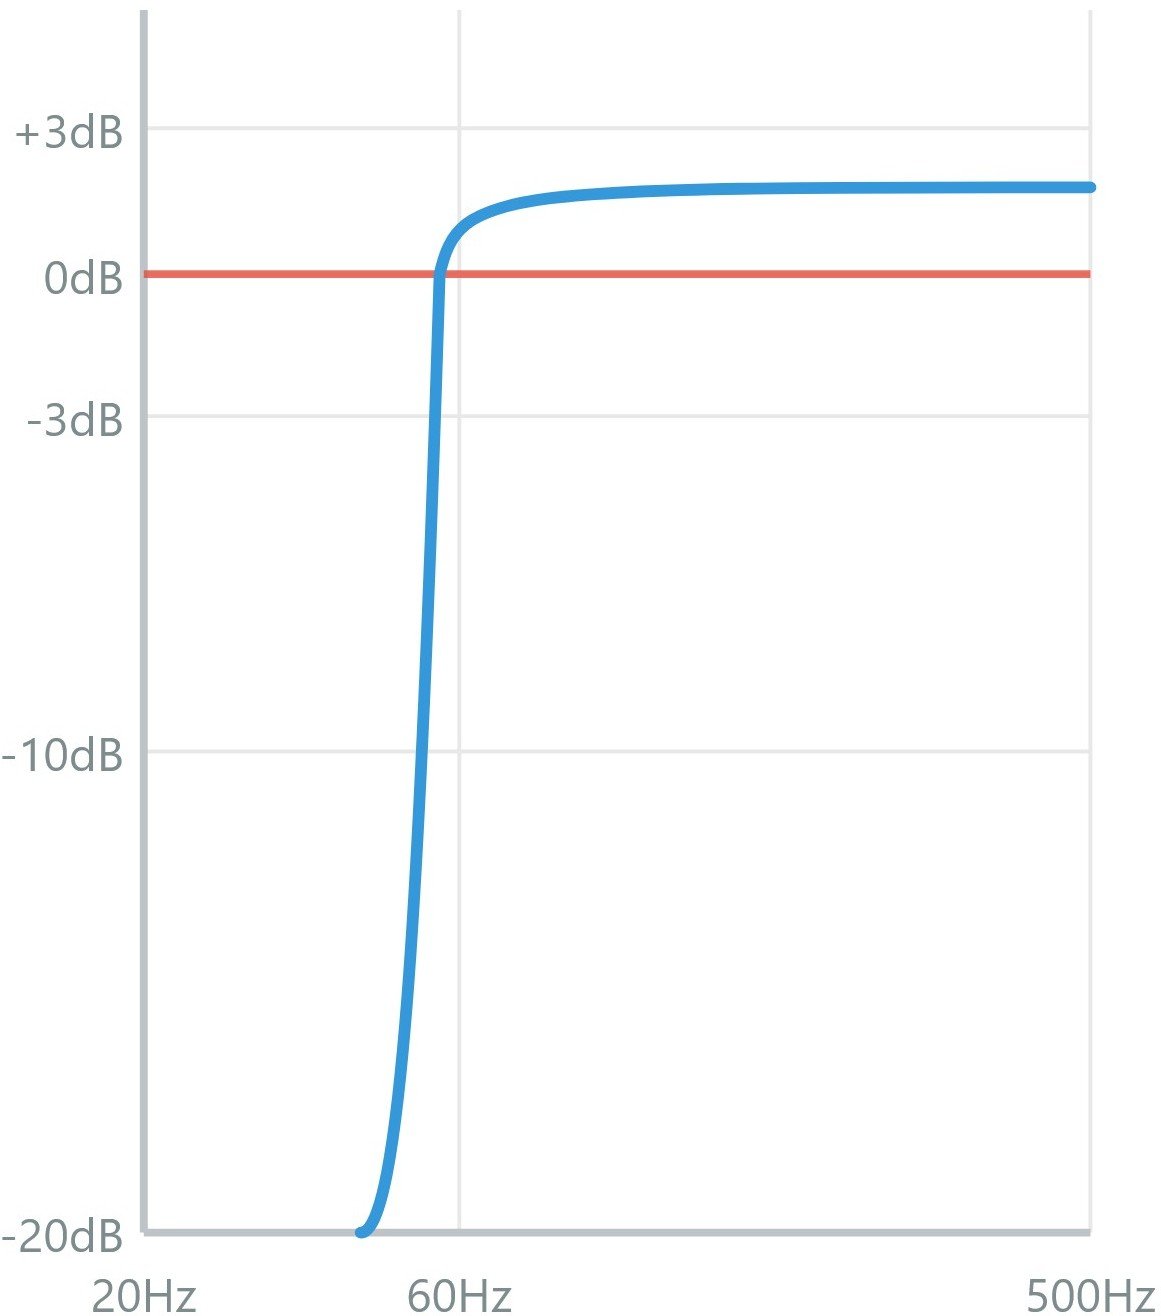
Trying to get low frequency bass using pure acoustics, the math is pretty brutal. We’re talking about an internal box volume of over 60 liters, just to get flat response down to 60 Hz. And that’s with ideal conditions. In reality, speaker impedance varies wildly with frequency, creating peaks and valleys that make the power transfer anything but constant. This adds to the fundamental problem: You’re always stuck with the same three-way tradeoff: Bass, box size, and power efficiency. Pick any two, and the third one suffers. Since I wanted something portable enough but still capable of delivering serious low-end punch, I chose bass depth and compact size, accepting that efficiency would take the hit. To make this work in practice, the DSP became essential.
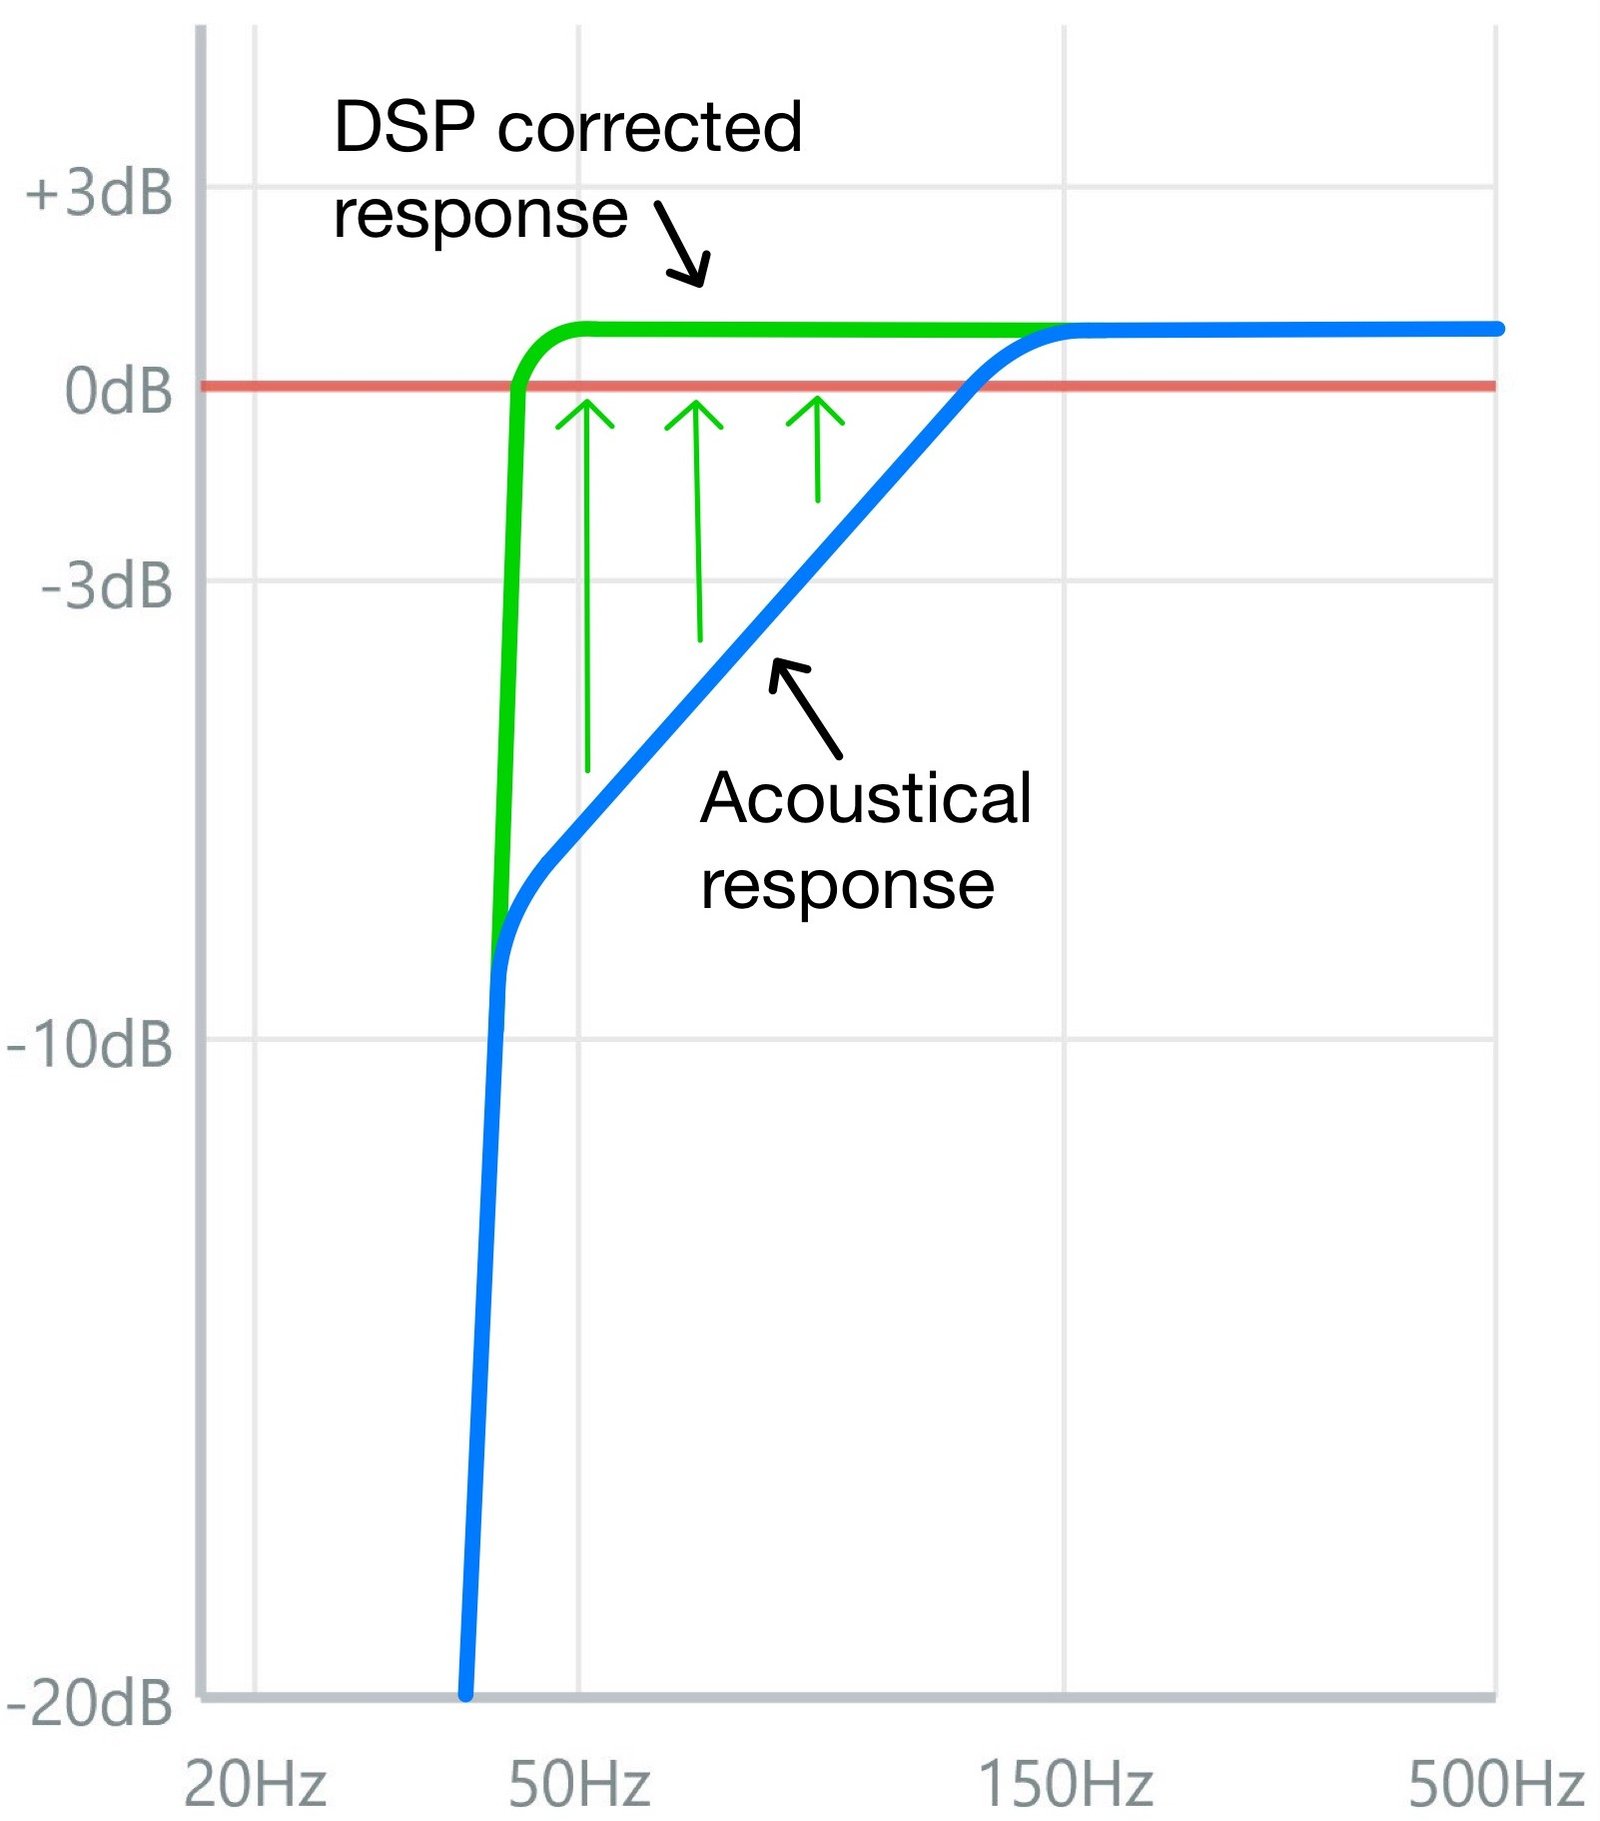
Instead of building a massive, “acoustically perfect” enclosure, I deliberately went the other direction. I made a box that would sound absolutely terrible without digital correction and tuned it way too low for its size.
The DSP boosts the bass frequencies that roll off in the small enclosure, directly trading power efficiency for size and bass response. The physics here is unforgiving: Boost by 3dB and you need double the power, 10dB requires 10 times the power, and 20dB means you’re looking at 100 times the power. I decided 10dB of correction was my practical limit, which let me tune the system for a flat response down to 45 Hz in a box with an internal volume of only 30 liters. The DSP also flattens out the widest impedance spikes and generally keeps the frequency response flat. But when doing so, you have to be careful not to overfit: Measurement errors can lead to corrections that actually make things worse, and every correction in the frequency domain has implications for the time domain through phase shifts and transient response changes.
Every speaker system has its breaking points, and they usually come down to a few key factors: How much air the driver can move (cone area times maximum excursion), how much power the driver, amplifier, and battery can handle, and basic electrical limits from Ohm’s law. For my 8-inch driver pushing deep bass, the mechanical limitations hit way before the power limits do. I could have chosen the safe route, which would limit the output to protect the driver, but that felt like giving up. Instead, I came up with variable bass management based on volume level. Here’s how it works: At low to moderate volumes (up to about 30%), you get the full deep bass experience down to 45 Hz. As you crank it up, the system automatically shifts the high-pass filter higher, keeping the driver right at its maximum safe excursion without going over. This still ensures a flat frequency response.
A lot of commercial speakers use something called Dynamic Bass Boost, which measures the audio content and directly adjusts the sound based on it. And honestly, I think it sounds terrible and cheap. These systems often lower the output when a bass beat happens. My system works differently: It knows what volume level you’ve set from your phone (clean integer steps from 0-15), applies the appropriate filtering for that level and stays put. No weird dynamic adjustments happening, just a consistent and clean sound.
Woodworking
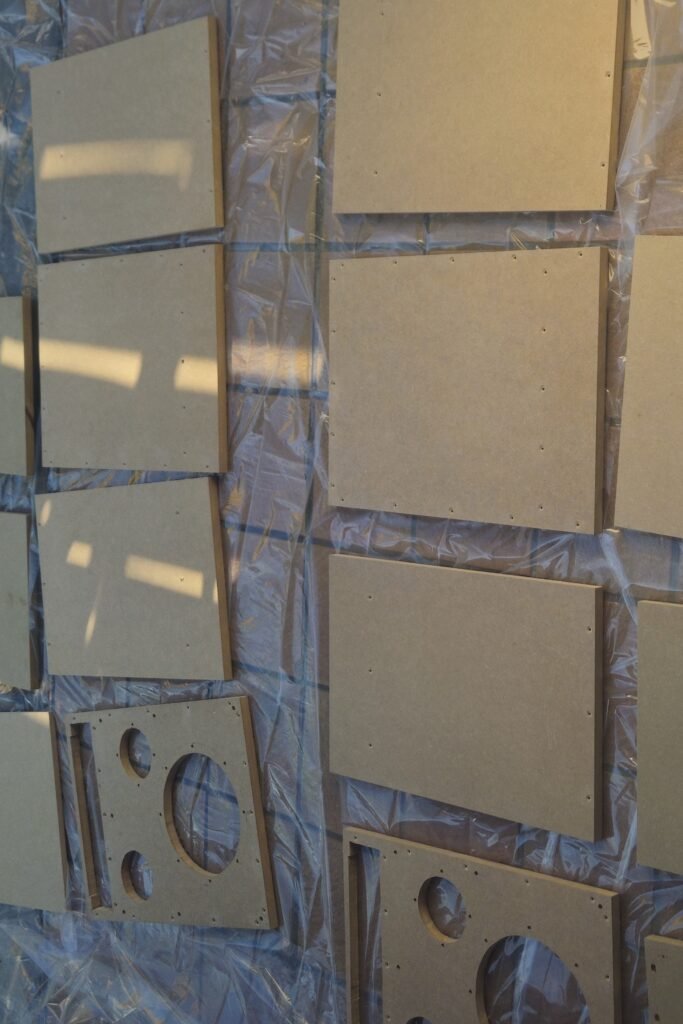
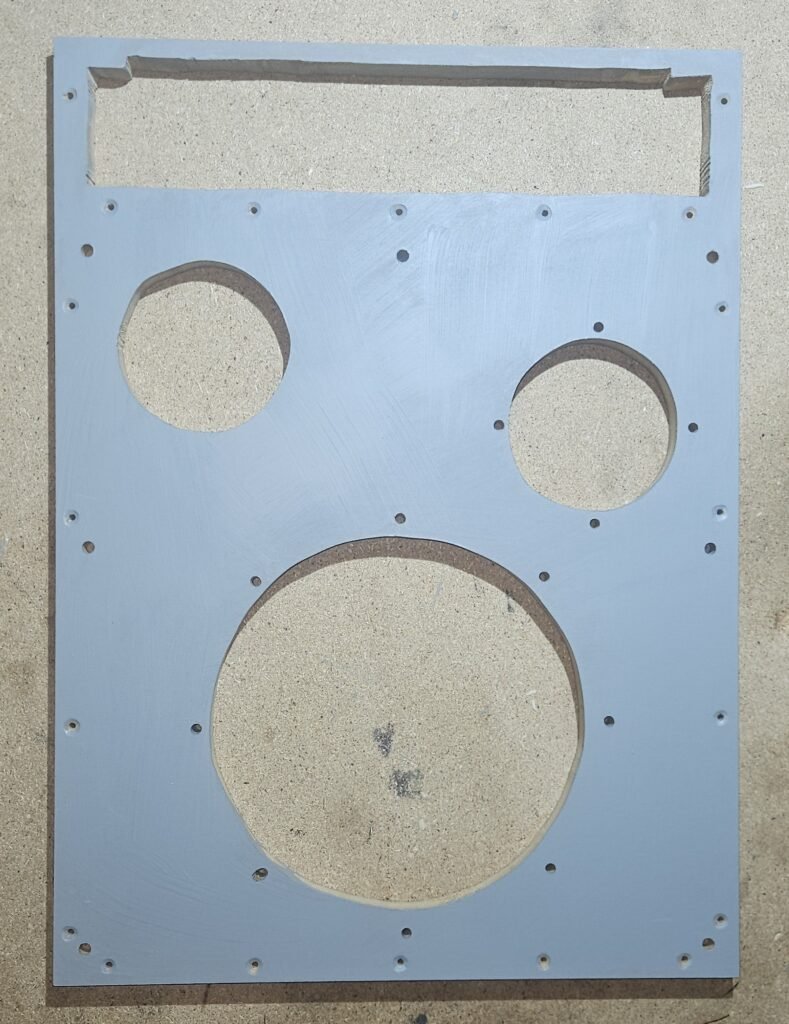
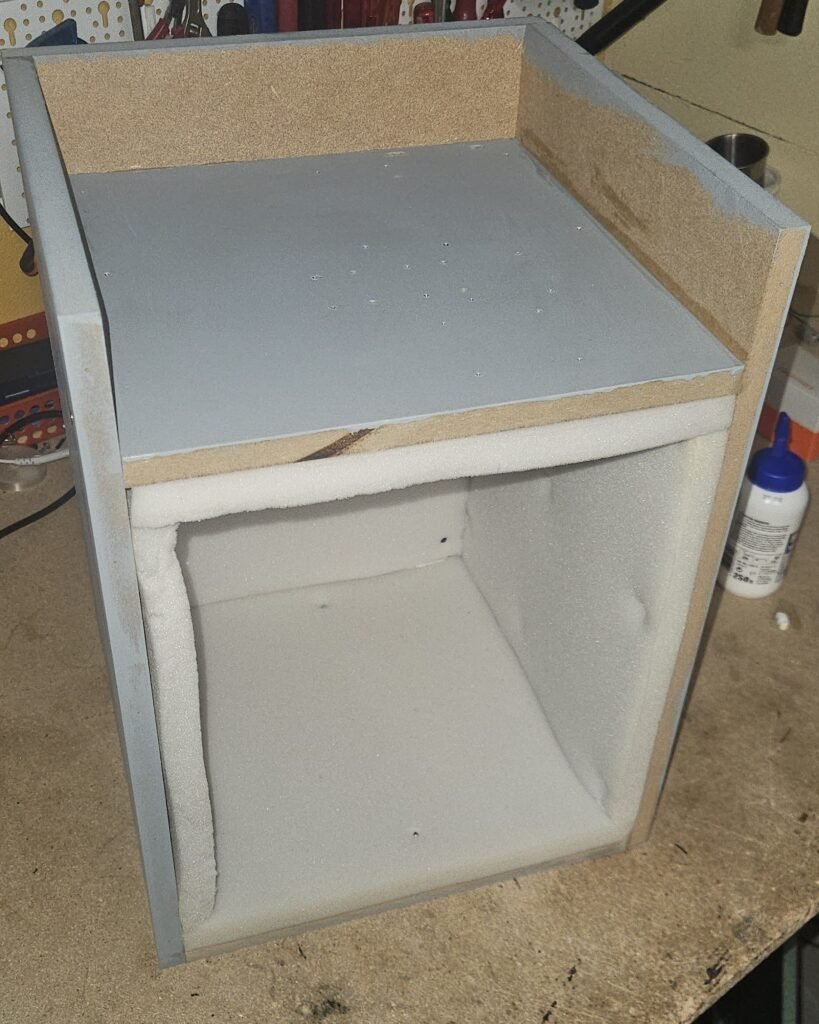

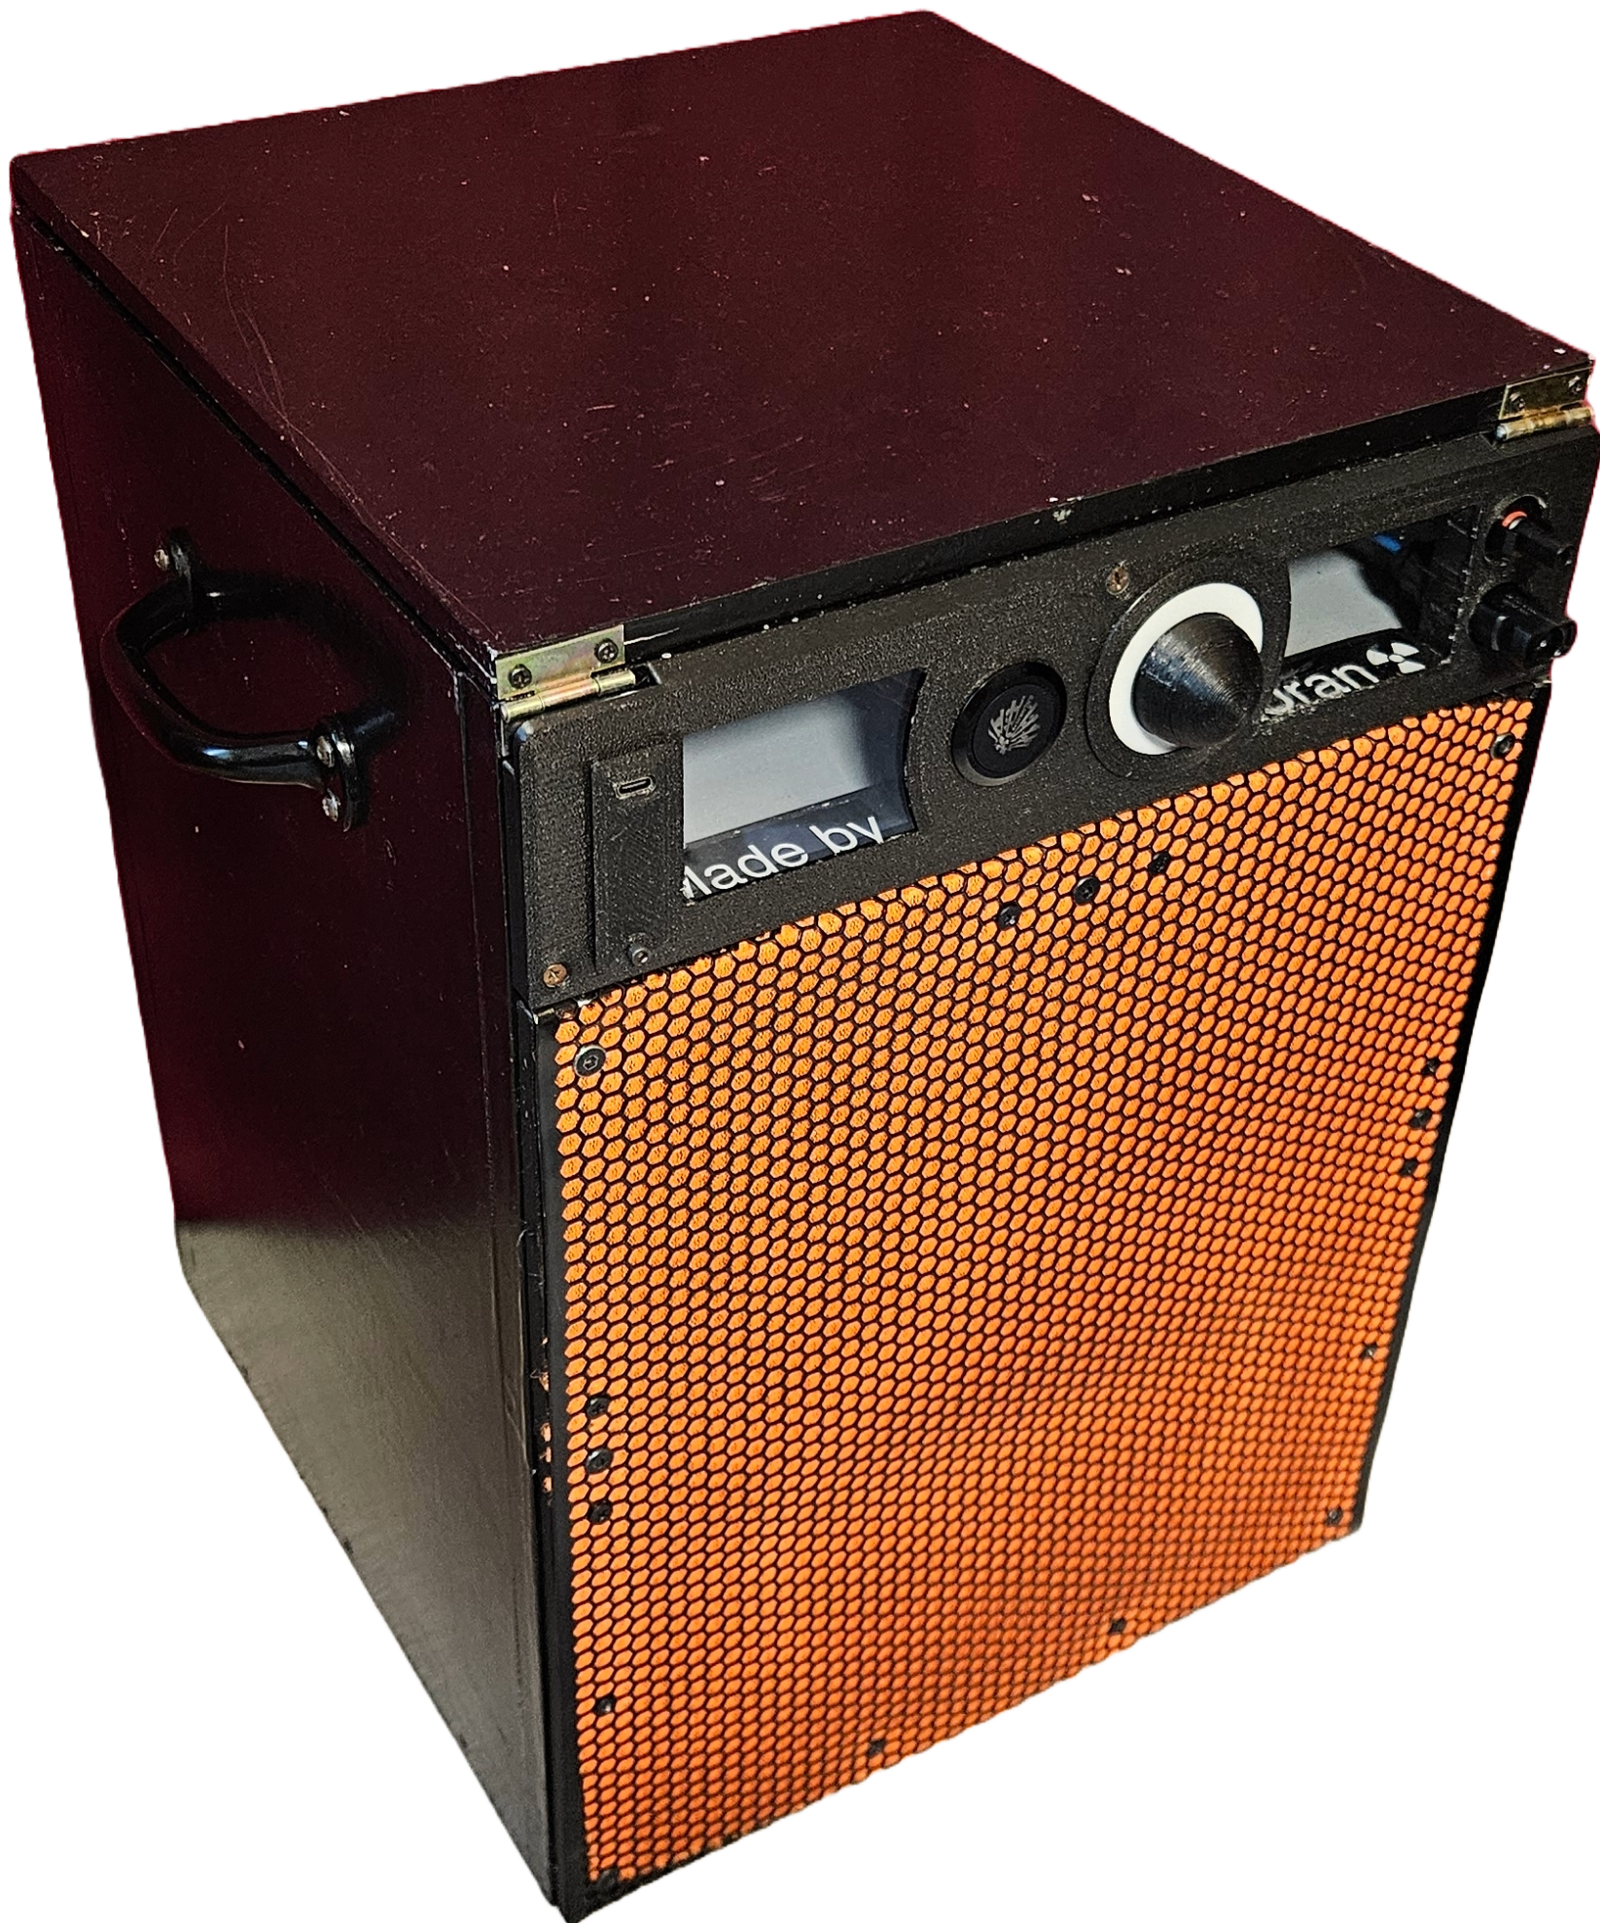
I have to admit: I’m a beginner when it comes to woodworking. And honestly, it’s not my favorite part of a project. But speakers need enclosures and enclosures need to be built, so here we are. I went with a fairly straightforward design: A rectangular box with an electronics cabinet on top, behind a 3D-printed panel. For the speaker section, I designed a removable grill, backed by some colorful fabric that gives the whole thing a bit of personality. Two handles on the side make it portable.
I made a significant material choice error by using MDF for an outdoor speaker: The moment it gets wet, it gets the structural integrity of soggy cardboard, while OSB would have been far more moisture-resistant. Of course, I only realized this after I already had a stack of MDF panels cut to size. The construction itself was straightforward enough: Cutting panels, mapping holes, and always predrilling before screwing into MDF to prevent splitting. For the electronics section, I predrilled mounting holes for the PCBs and installed threaded insert nuts with a bit of glue. Before sealing the acoustical chamber, I stuffed the interior with damping material to absorb internal reflections and prevent standing waves. But then came the real challenge: Protecting the moisture-sensitive MDF. The solution was multiple coats of oil-based outdoor primer and paint with proper drying time between layers. This was the kind of patience-testing process that makes you question your whole project. But it creates the waterproof finish that MDF desperately needs to survive a scout-camp.
Electronics and Software
This was by far my favorite part of the project, consuming about 90% of the time that went into the project. The electronics and software system is such a big topic that covering everything would turn this post into a novel. I’m keeping this to a broad overview here. The dedicated AudioBricks post dives deeper into technical details, challenges, and features.
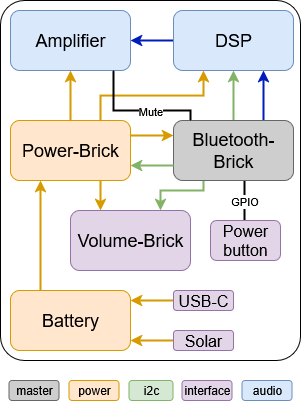
Having learned from the chaotic electronics of my first speaker, I knew I needed a completely different approach. I designed multiple custom PCBs, each handling a specific task and running its own embedded software. The modules communicate over I2C, creating a modular system that’s much easier to debug, maintain, and upgrade. Future improvements can be implemented as new modules or firmware updates to existing ones, without requiring a complete rebuild. When I want to experiment with different amplifier configurations, I swap out just that one board. When I need to update the user interface, for example, only the Volume Brick needs changes. It’s the kind of system that can evolve over time rather than becoming obsolete, which is exactly what I was hoping to achieve when I started this project.
AudioBricks
Modular electronics system designed to create customizable state-of-the-art Bluetooth speakers.
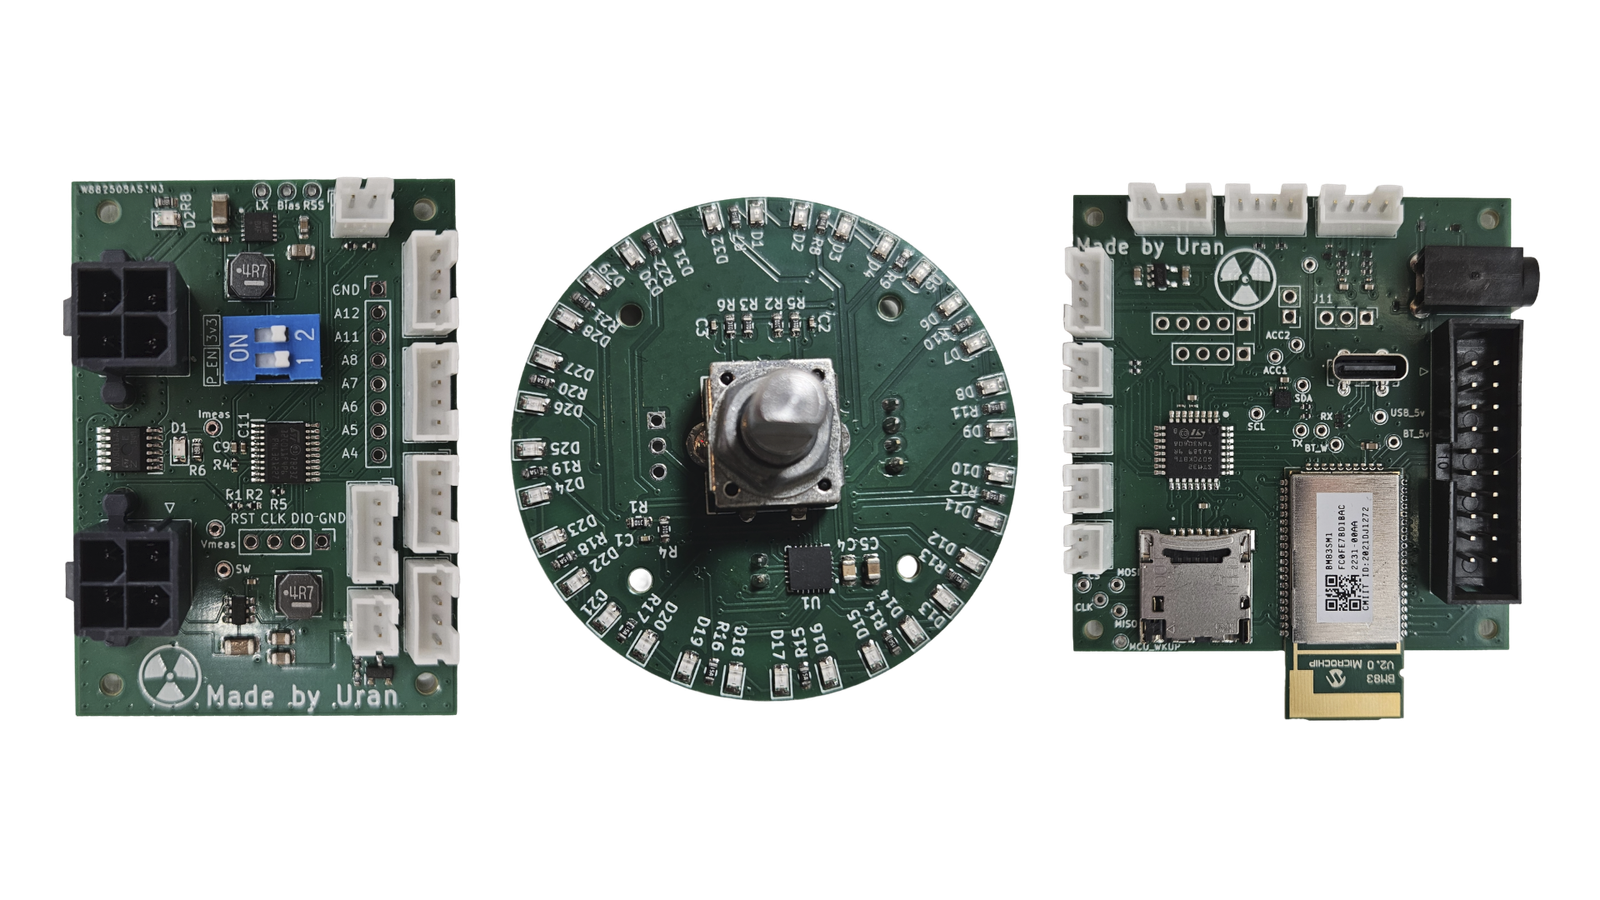
For the components where I couldn’t find anything off-the-shelf that fit my needs, I created my own PCBs, which I call “AudioBricks”.
- PowerBrick: This handles the power management. It switches the high-power amplifier line and provides regulated power to all other boards while keeping standby modes in mind, because nobody wants a speaker that drains its battery overnight. It constantly monitors system power consumption and battery level.
- BluetoothBrick: This serves as the system brain, managing audio streaming, codec processing, and coordinating all the other modules. It runs the main firmware that handles everything from Bluetooth connections to the smart features I couldn’t resist adding, like an alarm clock and app communication. And of course, it houses an extremely low-power accelerometer, able to remain active during standby. Remember the previously hinted idea of a screaming speaker when not treated well? Yeah…
- VolumeBrick: Uses an encoder and LEDs to stay perfectly synchronized to the phone’s volume. Getting this synchronization working was way harder than it sounds.
For components that were already available the way I needed, I chose proven off-the-shelf solutions rather than trying to reinvent the wheel.
- Amplifier: I went with the “AA-AB32361” Class D stereo board delivering 2×160W. As already mentioned, I don’t use it as a traditional stereo amplifier. Instead, one channel drives the woofer and the other drives the tweeter.
- DSP: I used the “APM2” board built around the ADAU1701 chip. It handles all the digital crossover and frequency corrections. Unfortunately, the documentation for the APM2 is quite bad and getting it to work properly was a challenge. In hindsight, it would probably have taken less time to design the well documented ADAU1701 chip directly into the BluetoothBrick.
- Battery: The “PS-BC12117” board manages six 21700 lithium cells, providing over 100Wh of energy storage. It includes protection circuits, cell balancing, and an MPPT charger.
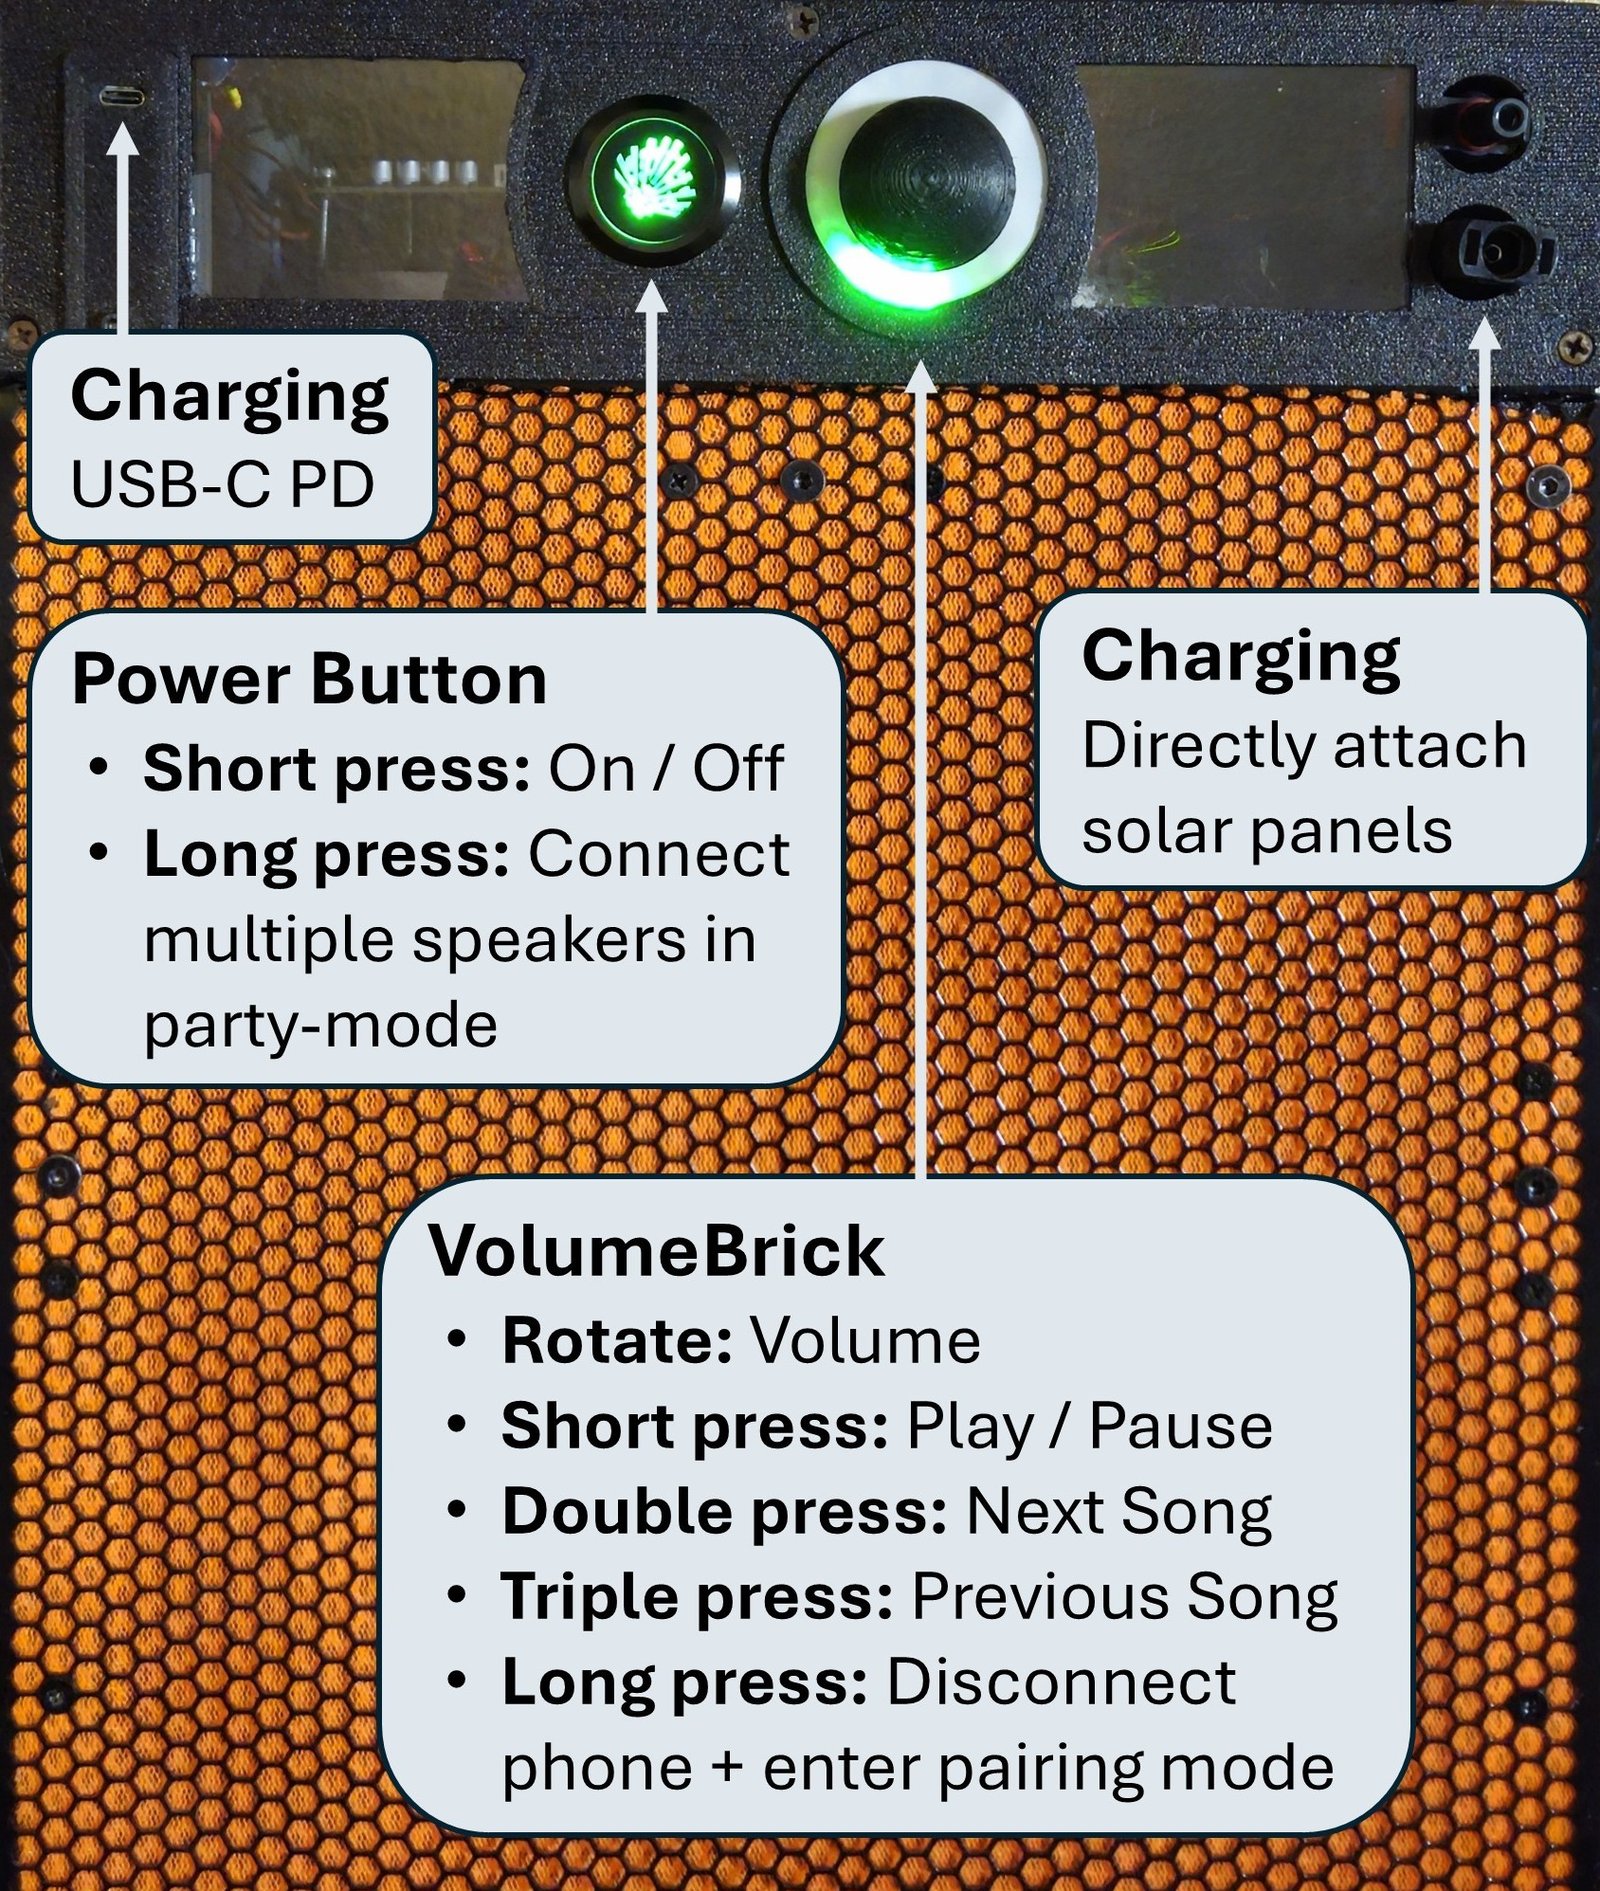
The speaker can be charged via USB-C Power Delivery, or directly from solar panels using the integrated MPPT charging controller. This feature is crucial during our 2-week scout camps with no access to electricity. The custom button has the logo of our scouts organization and handles power on/off plus connecting multiple speakers in party mode. The RGB LED in the button indicates the speaker’s state. Next to it is the VolumeBrick with its encoder and LED indication ring. The clear acrylic windows let people peek into the electronics chamber, which can be illuminated by software.
The physical controls are designed minimally on purpose. But where are all those features and endless customization options I promised? Here’s where things got really fun: I developed a mobile app using Flutter that connects via Bluetooth Low Energy to provide complete system control, separate from the audio streaming connection. The app handles everything from EQ adjustments to advanced features like volume limits, custom alarms, and blacklists.
Conclusion
After countless hours of designing, building and debugging, I can confidently say this project delivered everything I hoped for and even more. The sound quality actually surprised me. The crisp highs stay clean even at volume, the frequency response remains flat across the spectrum. Even though the DSP boosts certain bass frequencies by over 10x, it doesn’t sound synthetic at all. When you crank up indoors, the low-frequency rumble fills entire rooms. The variable bass management system is practically invisible in operation, seamlessly maintaining that deep punch at lower volumes while protecting the driver when things get loud.
However, the power and size limitations become apparent outdoors. When I need to fill huge open fields with loud music, I still find myself reaching for the good old “TotallyNotABomb.” Its absurdly loud volume levels can blast much further, and the 15-inch subwoofer simply moves more air than any amount of DSP wizardry can compensate for. Sometimes brute force wins, and that’s okay.
But where this new system absolutely shines is in everything else. The modular AudioBricks architecture works flawlessly. The VolumeBrick’s synchronization with the phone is so seamless that people don’t even realize it’s happening. Solar charging was so simple that our speakers actually were charged most of the time in our outdoor camp. Sure, it doesn’t have the raw power to drown out entire fields like my childhood creation, but it evolved into exactly what I set out to build: A reliable, user-friendly speaker system that sounds and feels professional.